Living Room — Modern
Vacant living room to reviewed listing proof

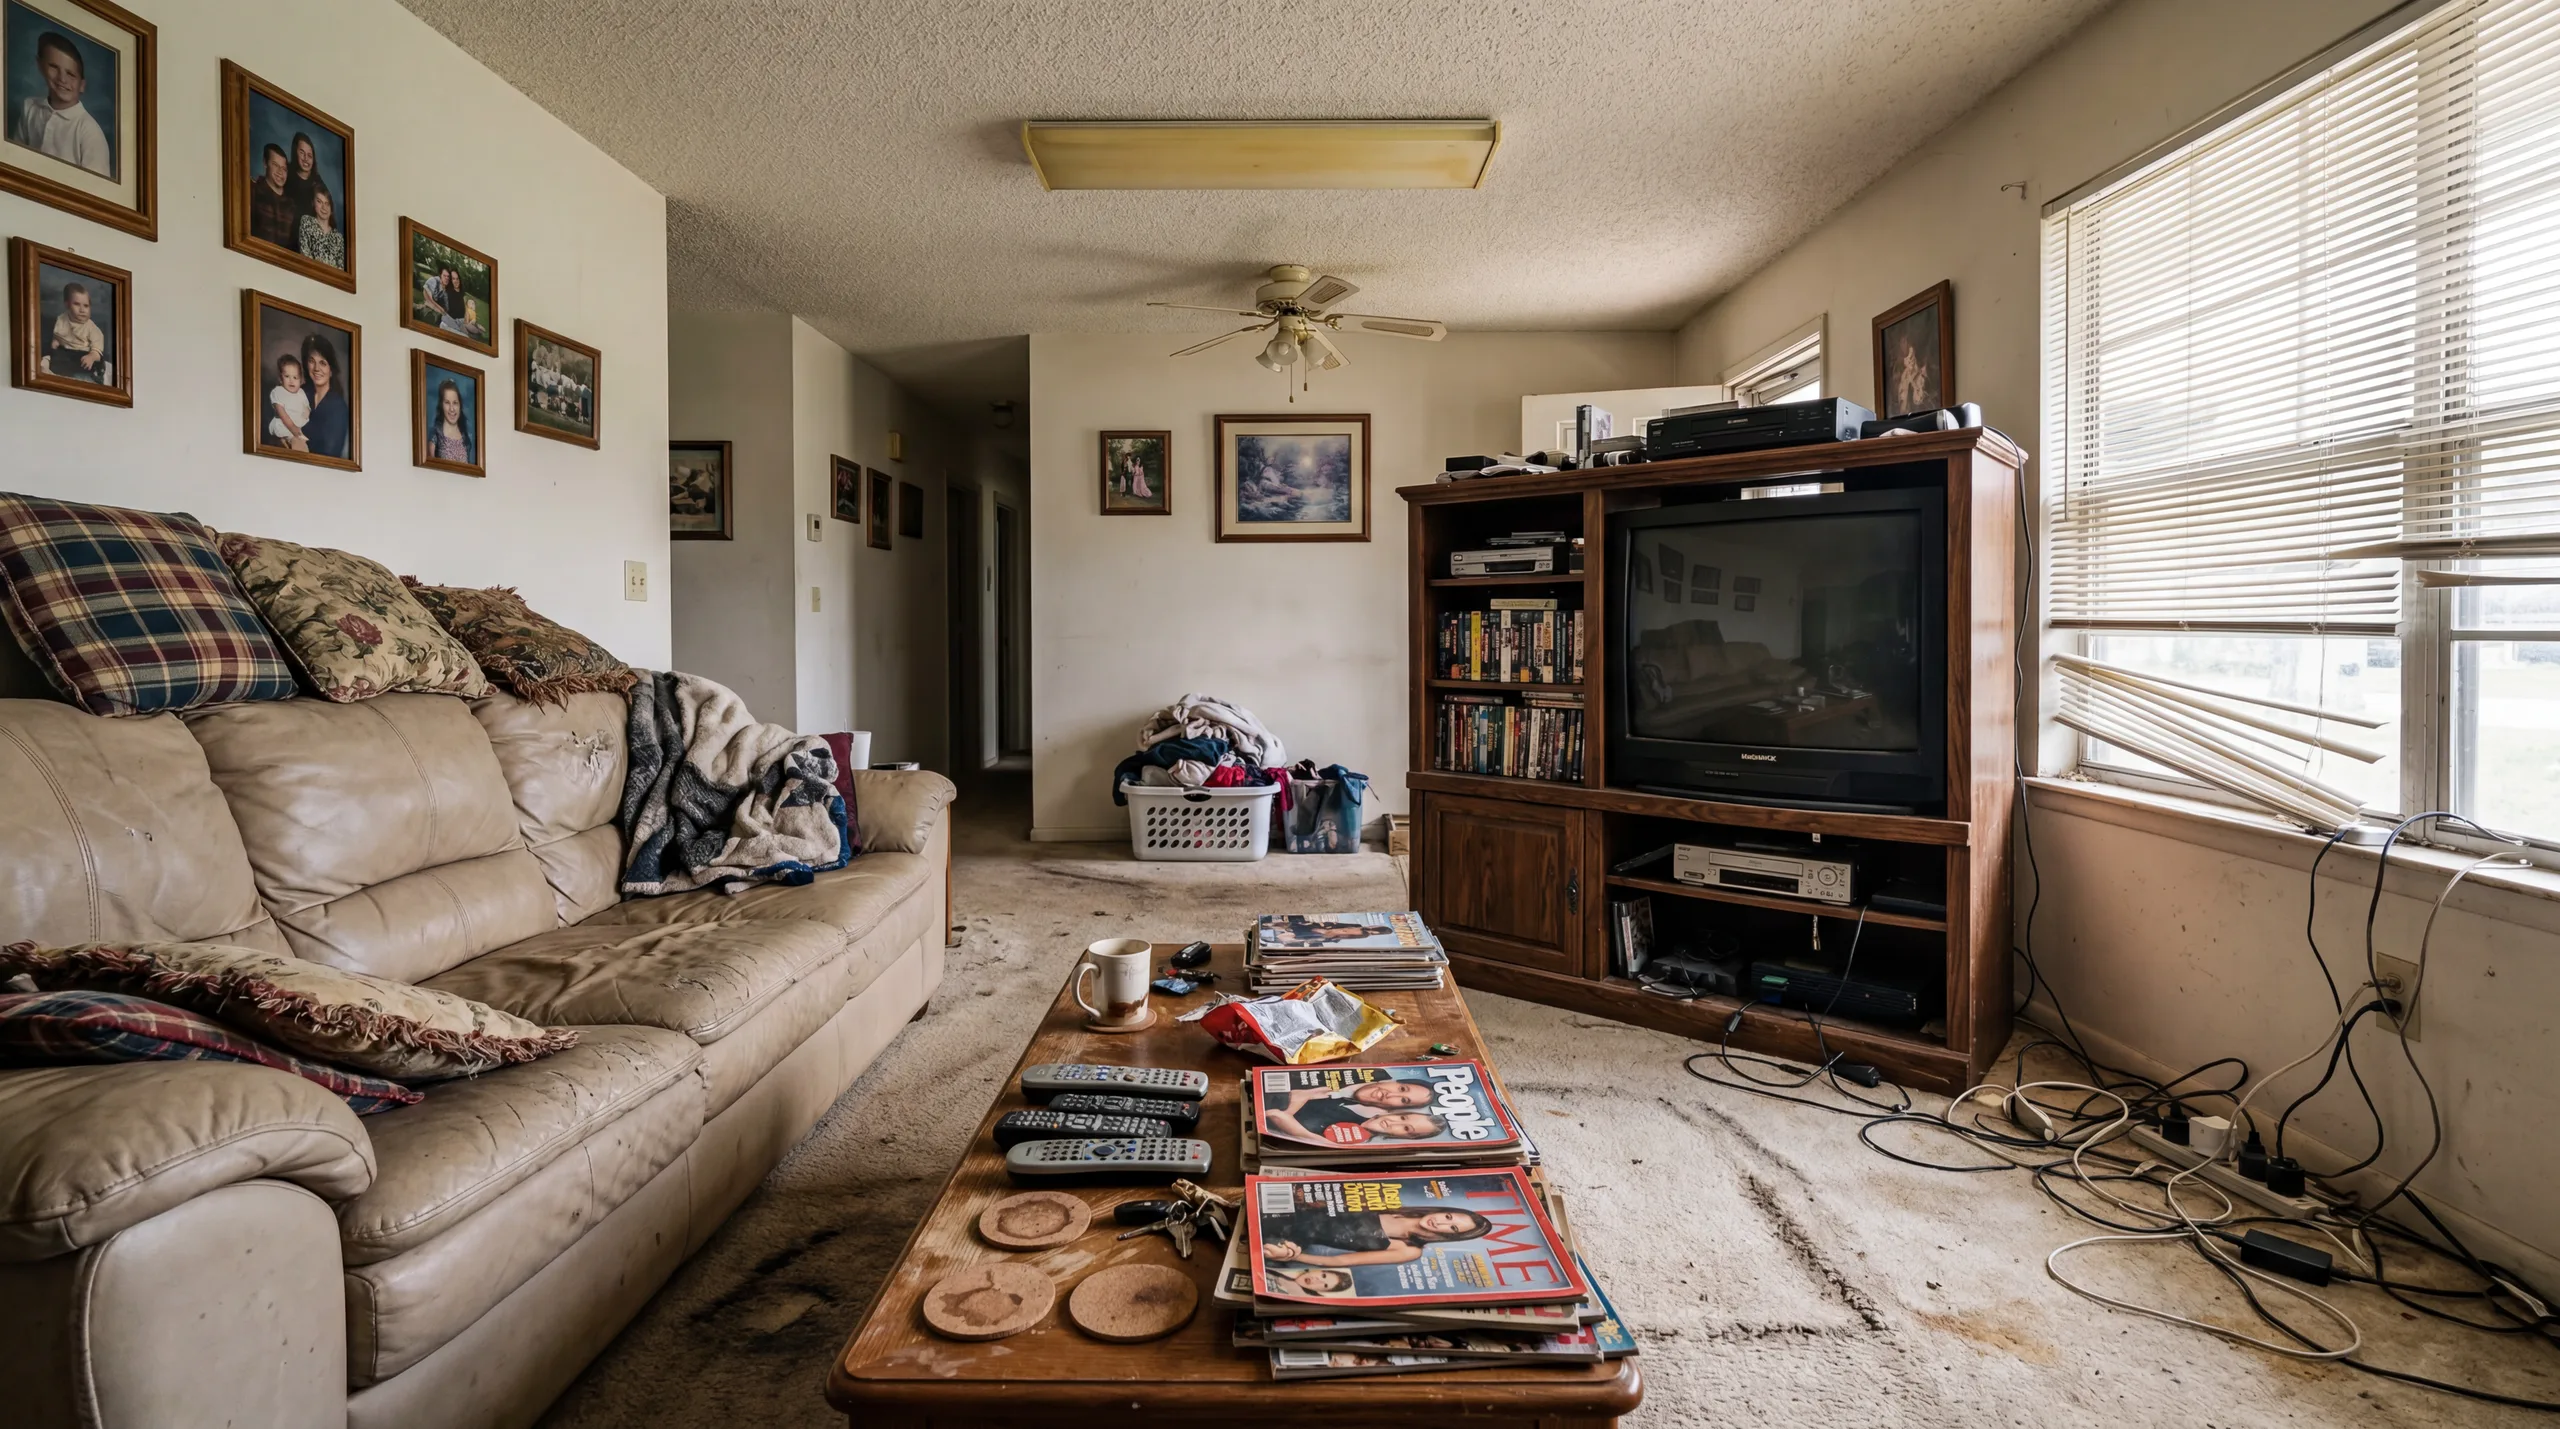 Before
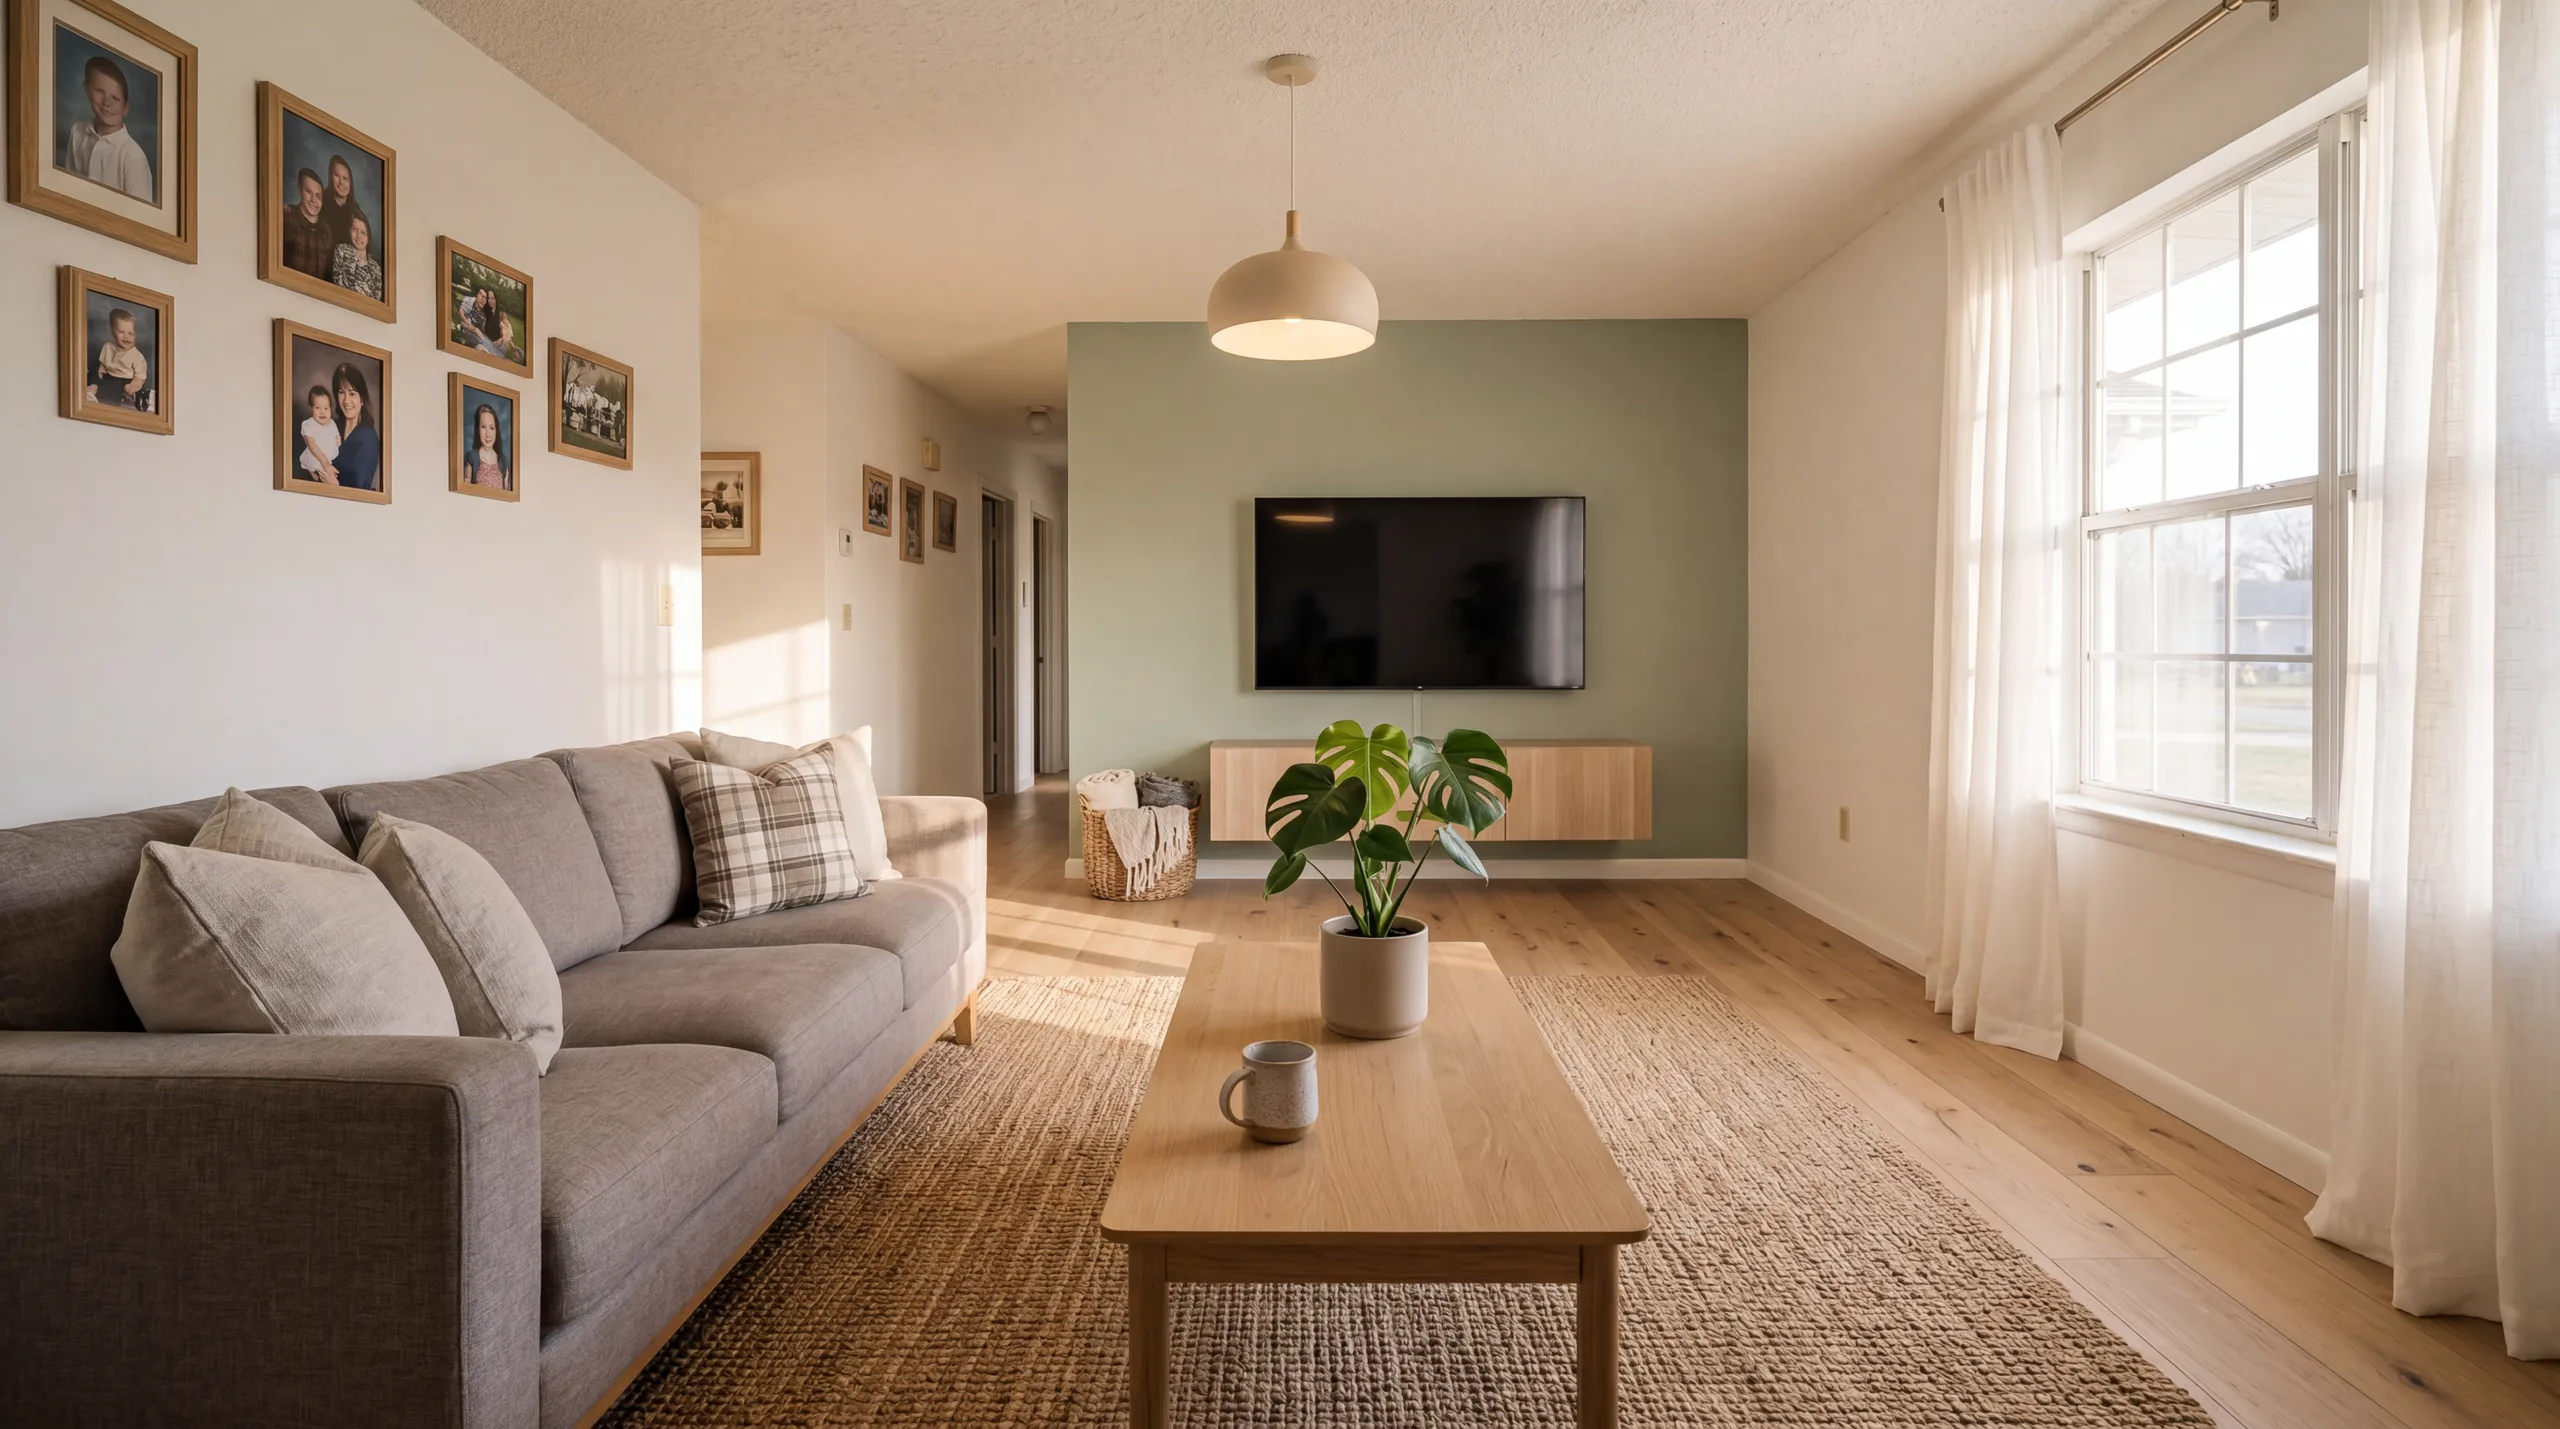 After
AfterTalk Track
"Use this pair to review whether sofa scale, traffic flow, windows, and floor direction still match the original room."
Compare original and staged room pairs. Use the slider to inspect structure, scale, and whether the result is safe to review for a listing workflow.
These examples show the kind of original-to-staged comparison every listing image needs. The staged version should help explain the space without hiding fixed details or changing the room's structure.
Transformation Stories
Real talk-tracks that listing agents, hosts, and consultants use to help someone picture a better life inside the same footprint.
Living Room — Modern
BeforeAfterTalk Track
"Use this pair to review whether sofa scale, traffic flow, windows, and floor direction still match the original room."
Bedroom — Scandinavian

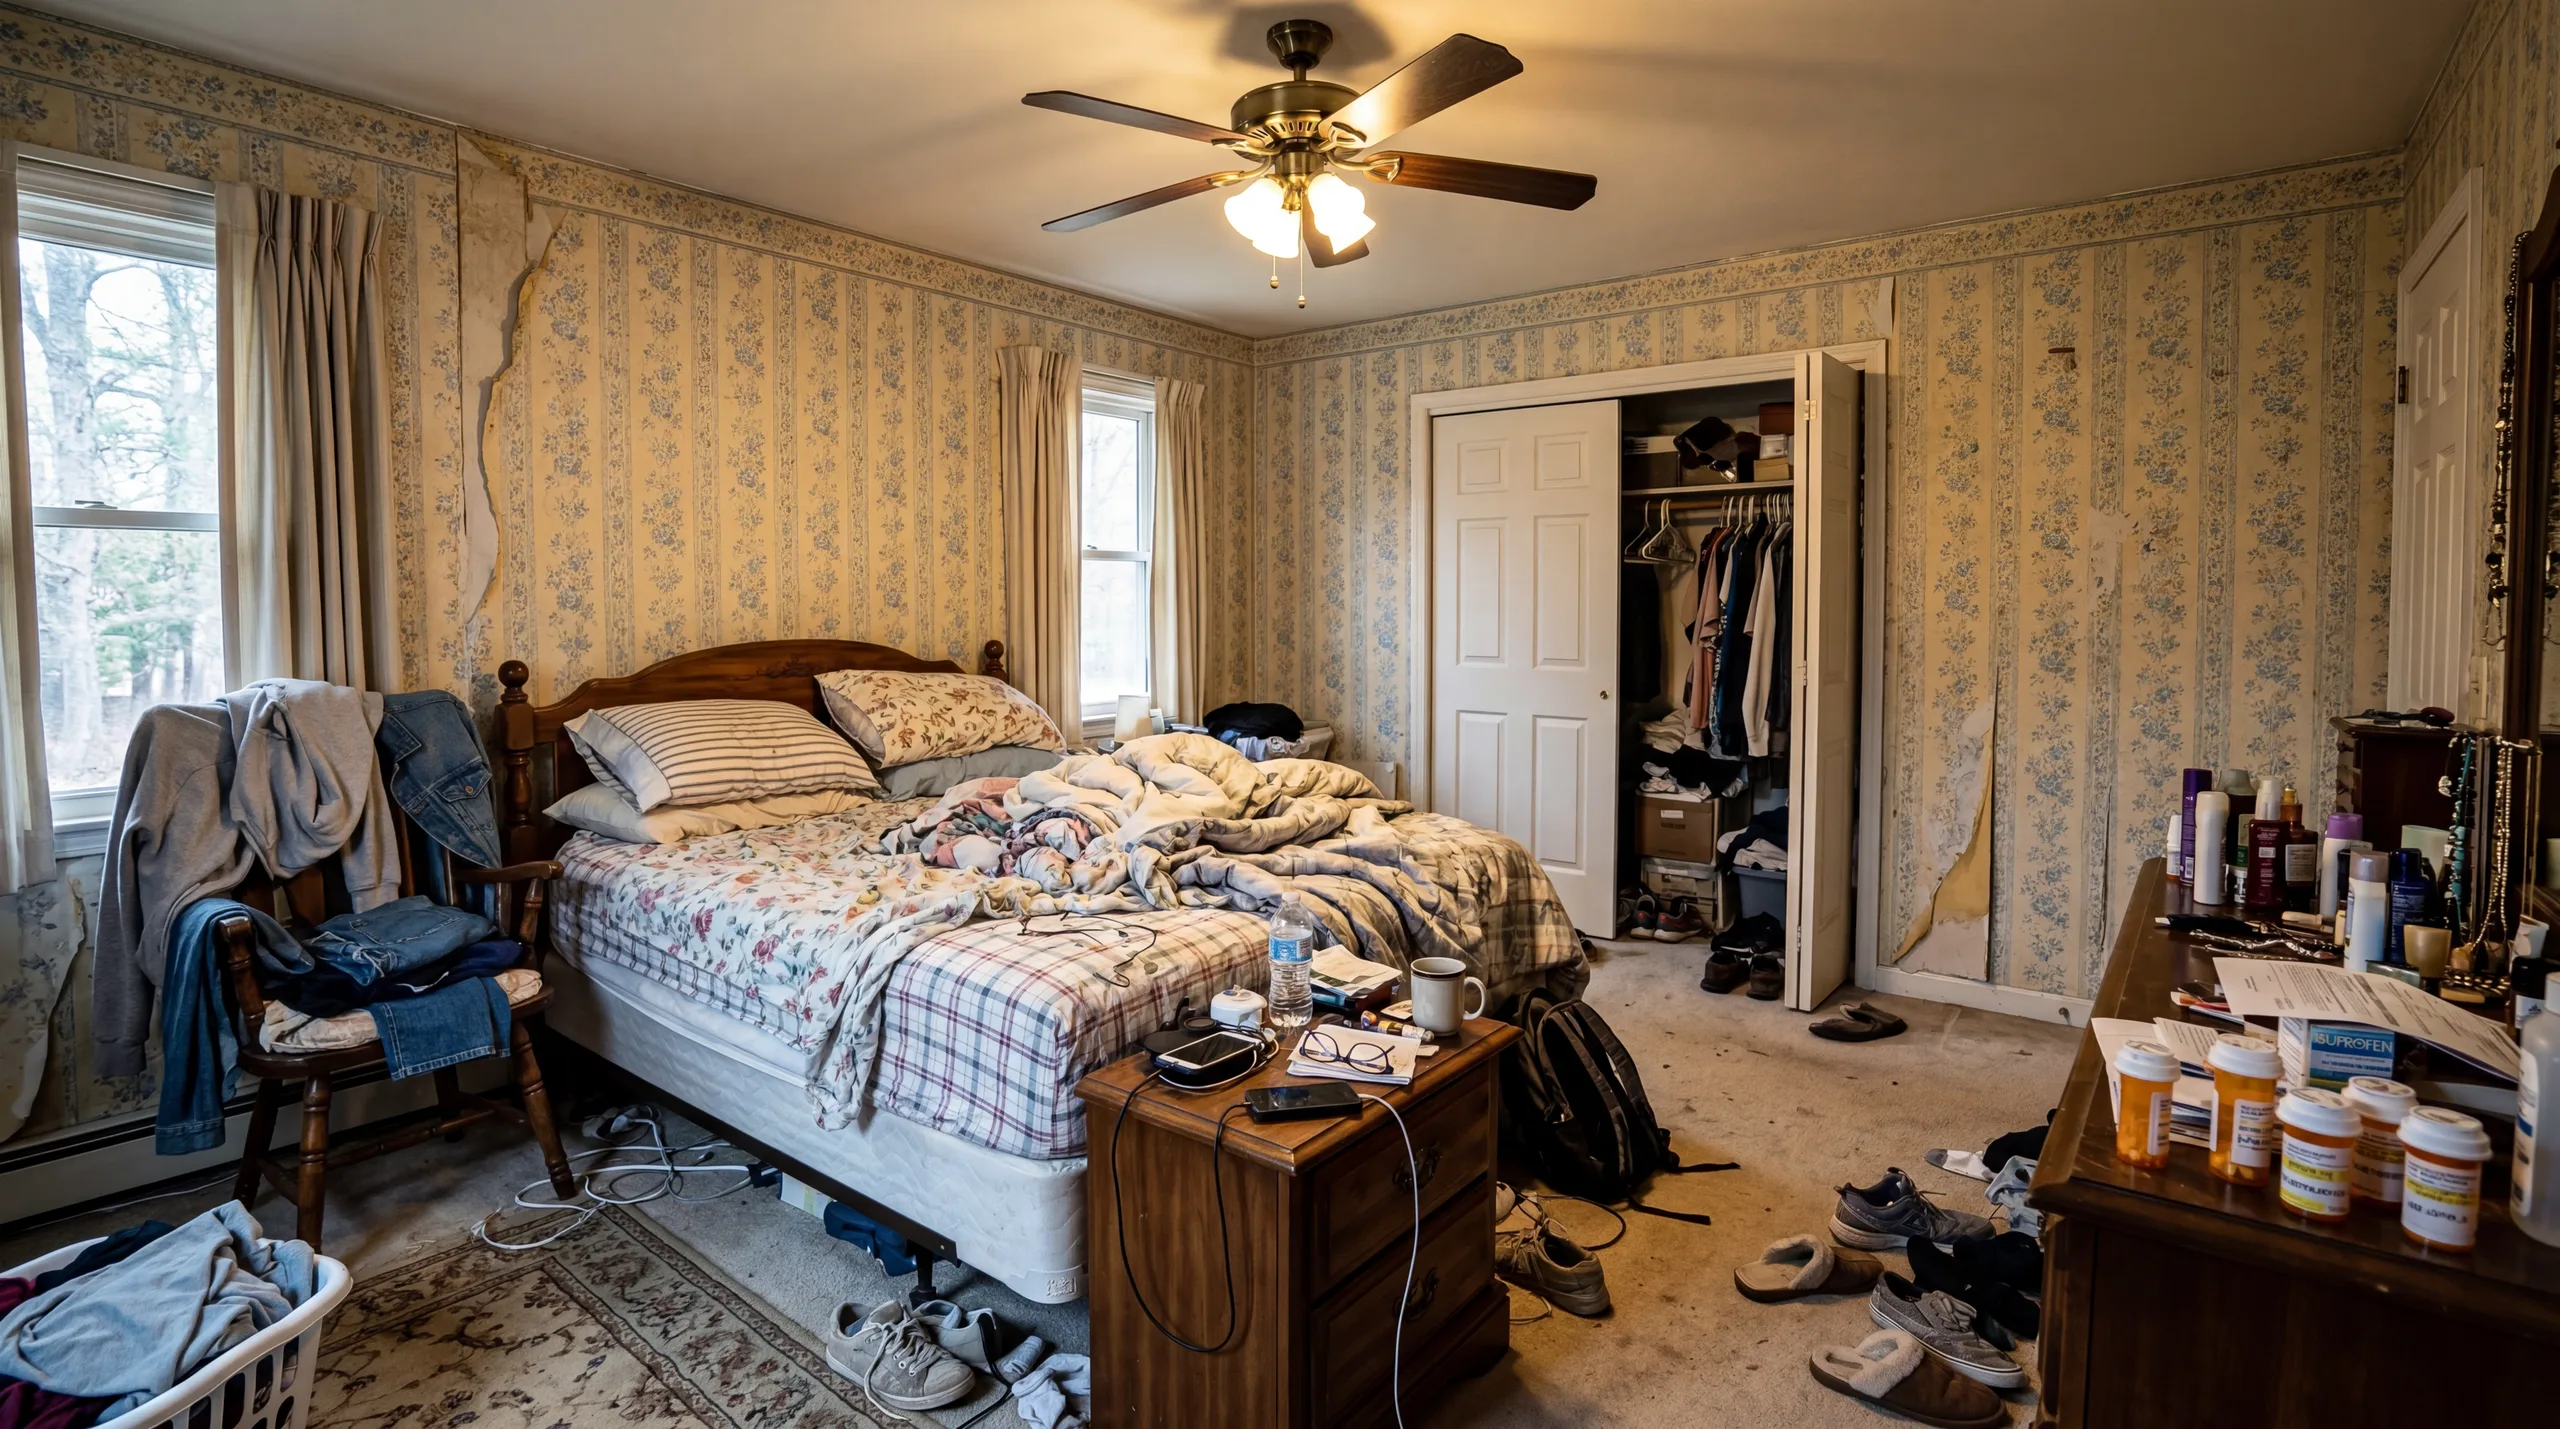 Before
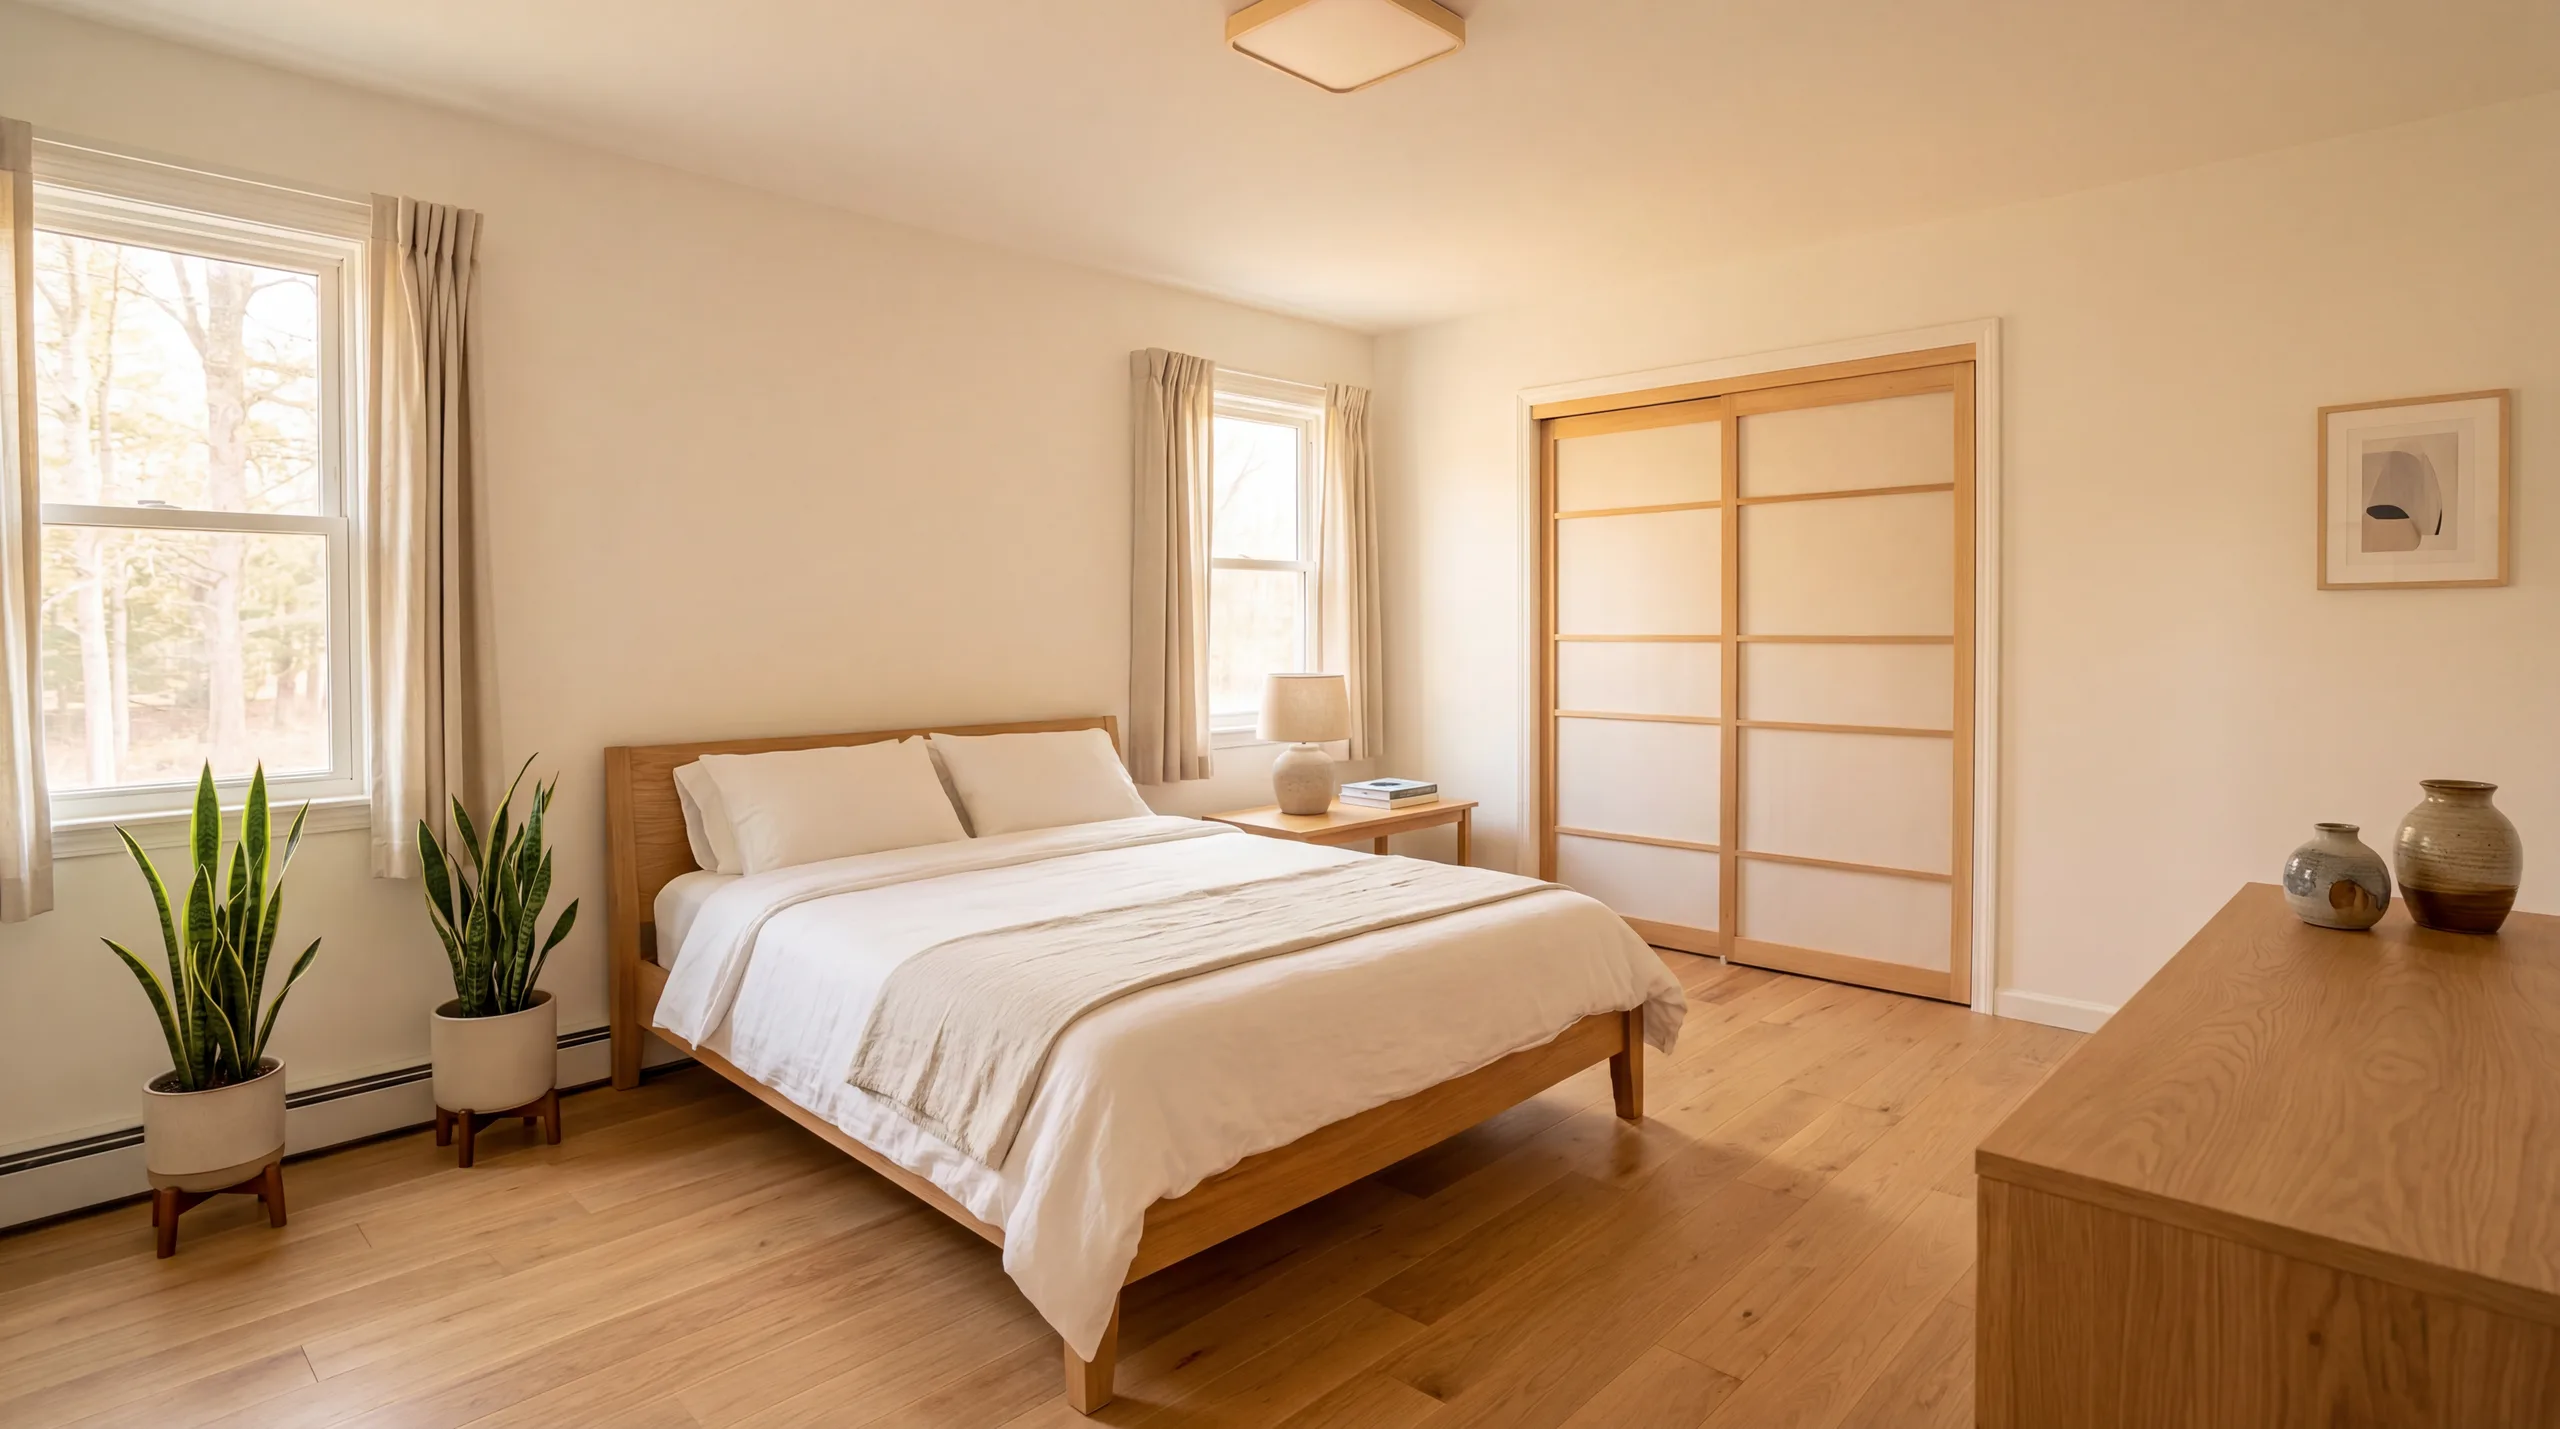 After
AfterTalk Track
"The staged version adds bedding and furniture direction. The useful review question is whether the room still feels honest and measurable from the original."
Kitchen — Contemporary

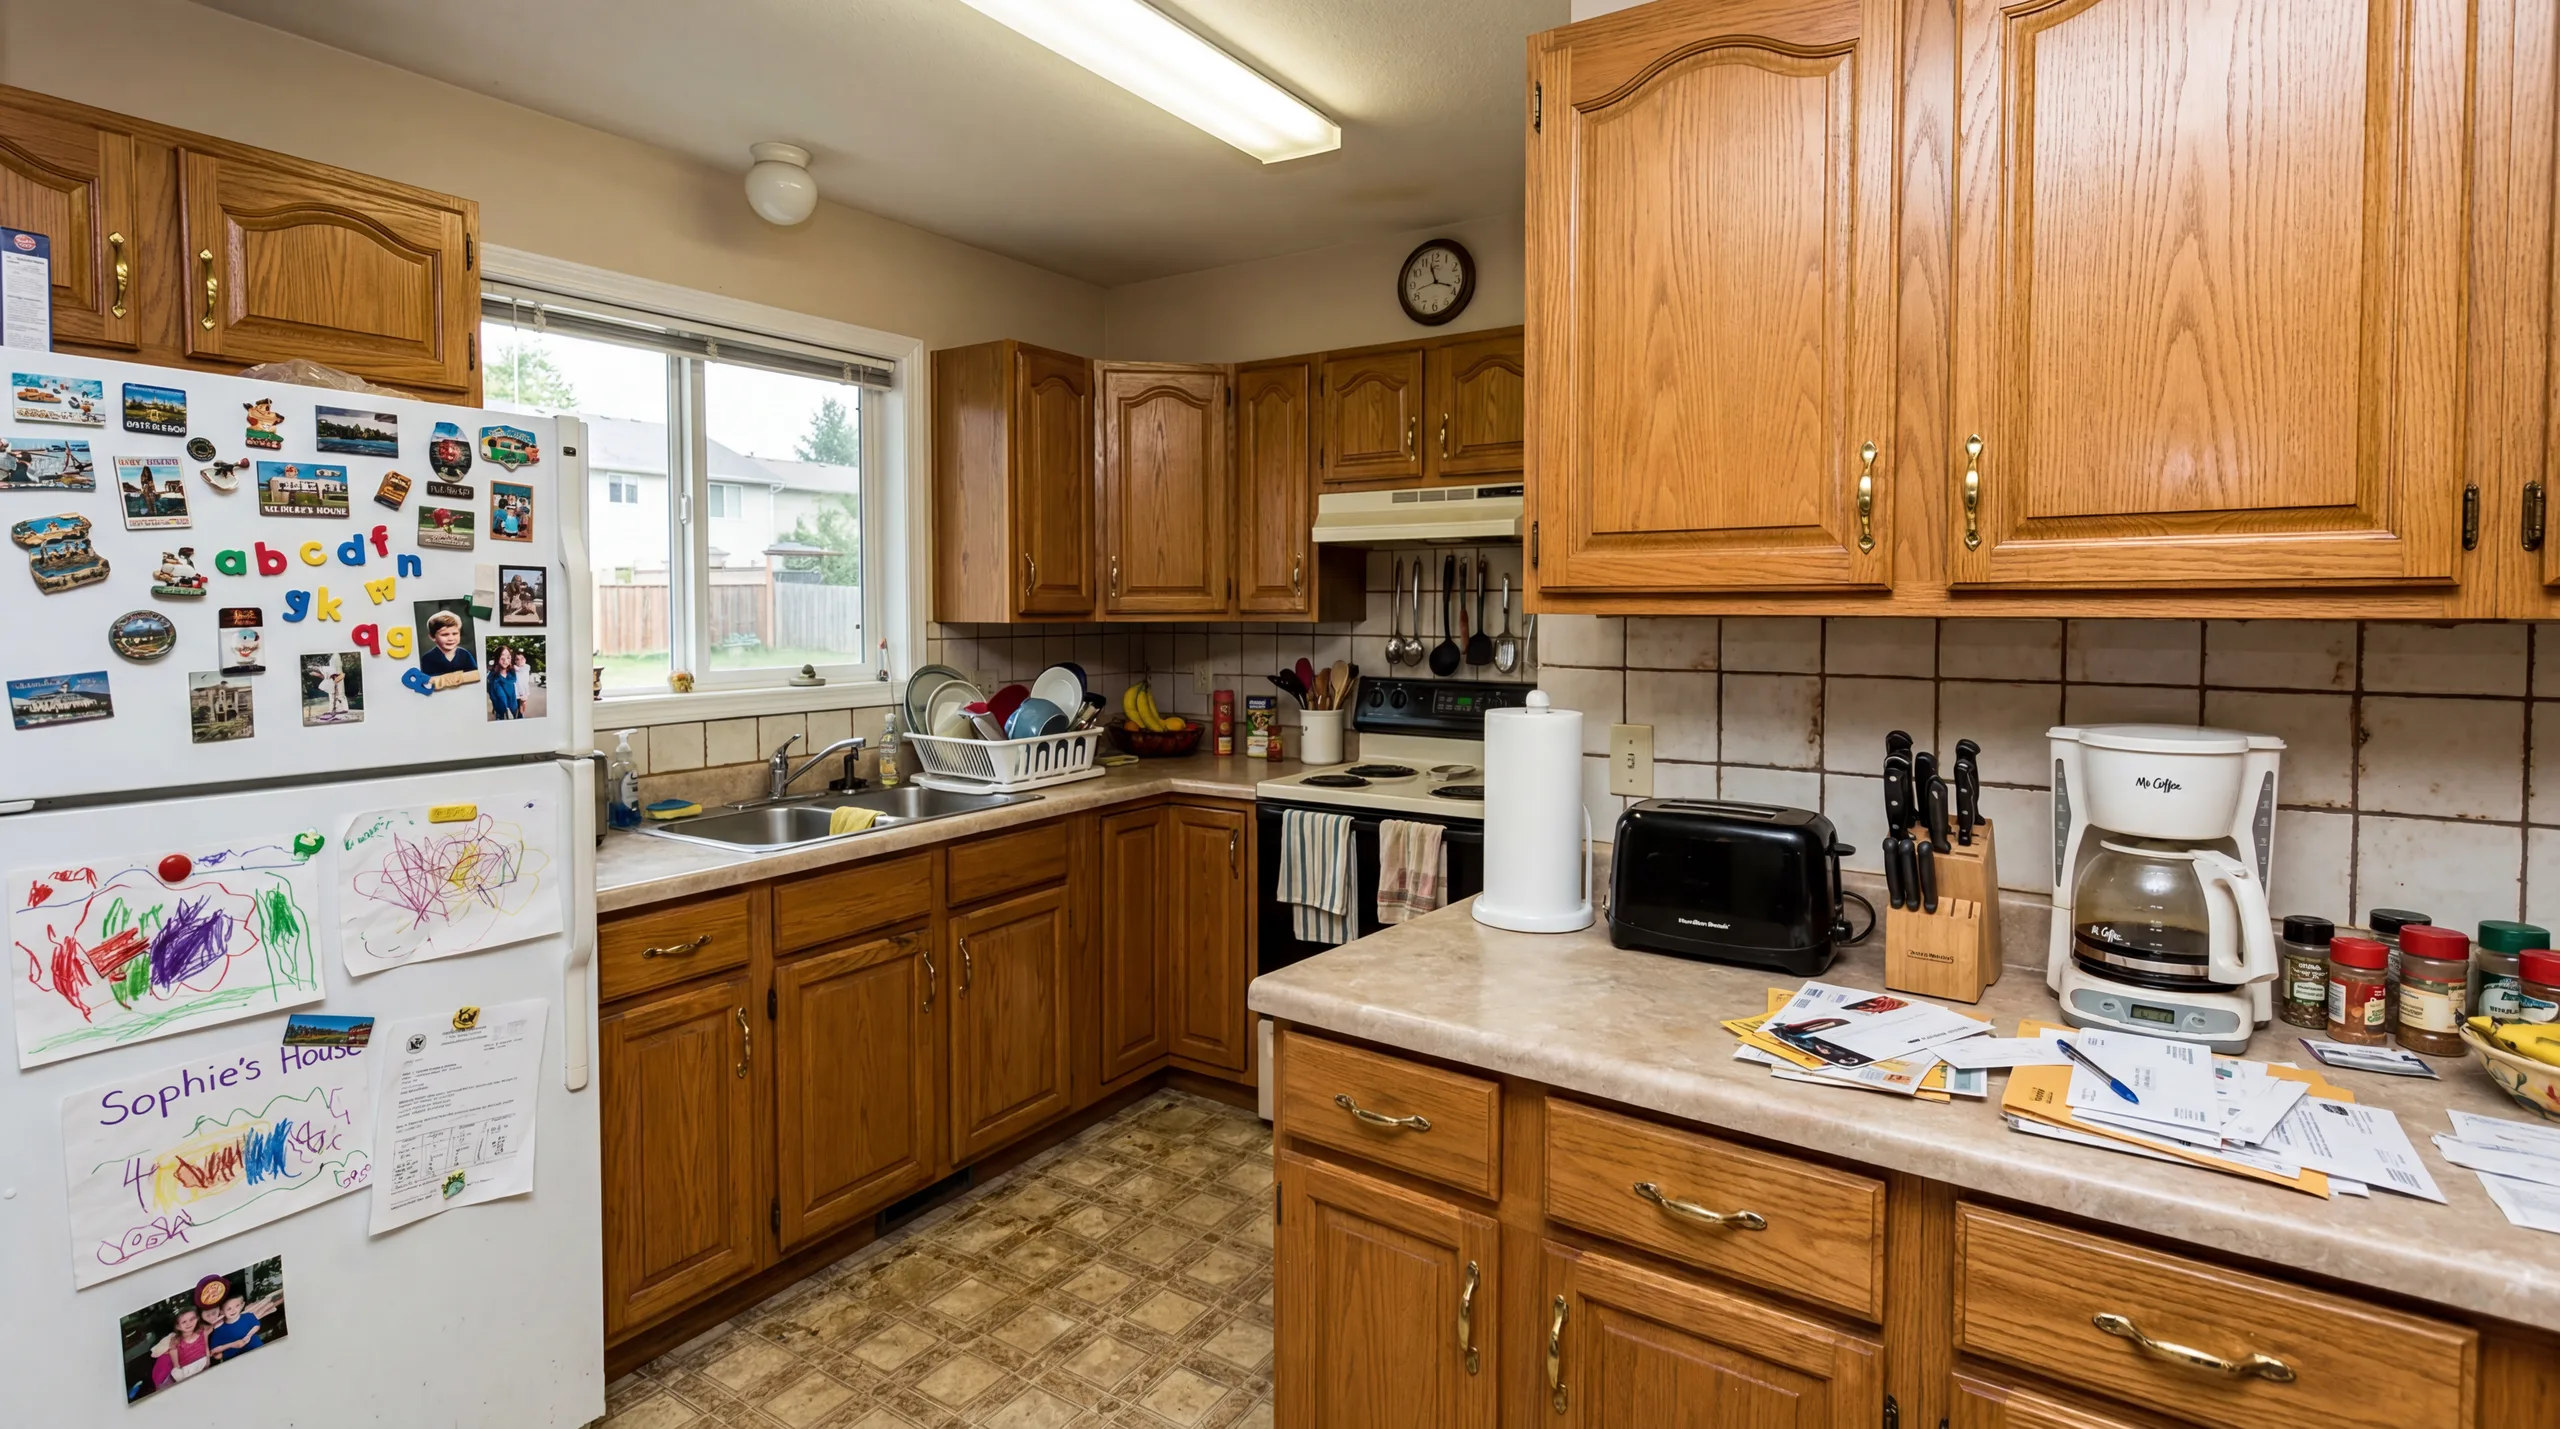 Before
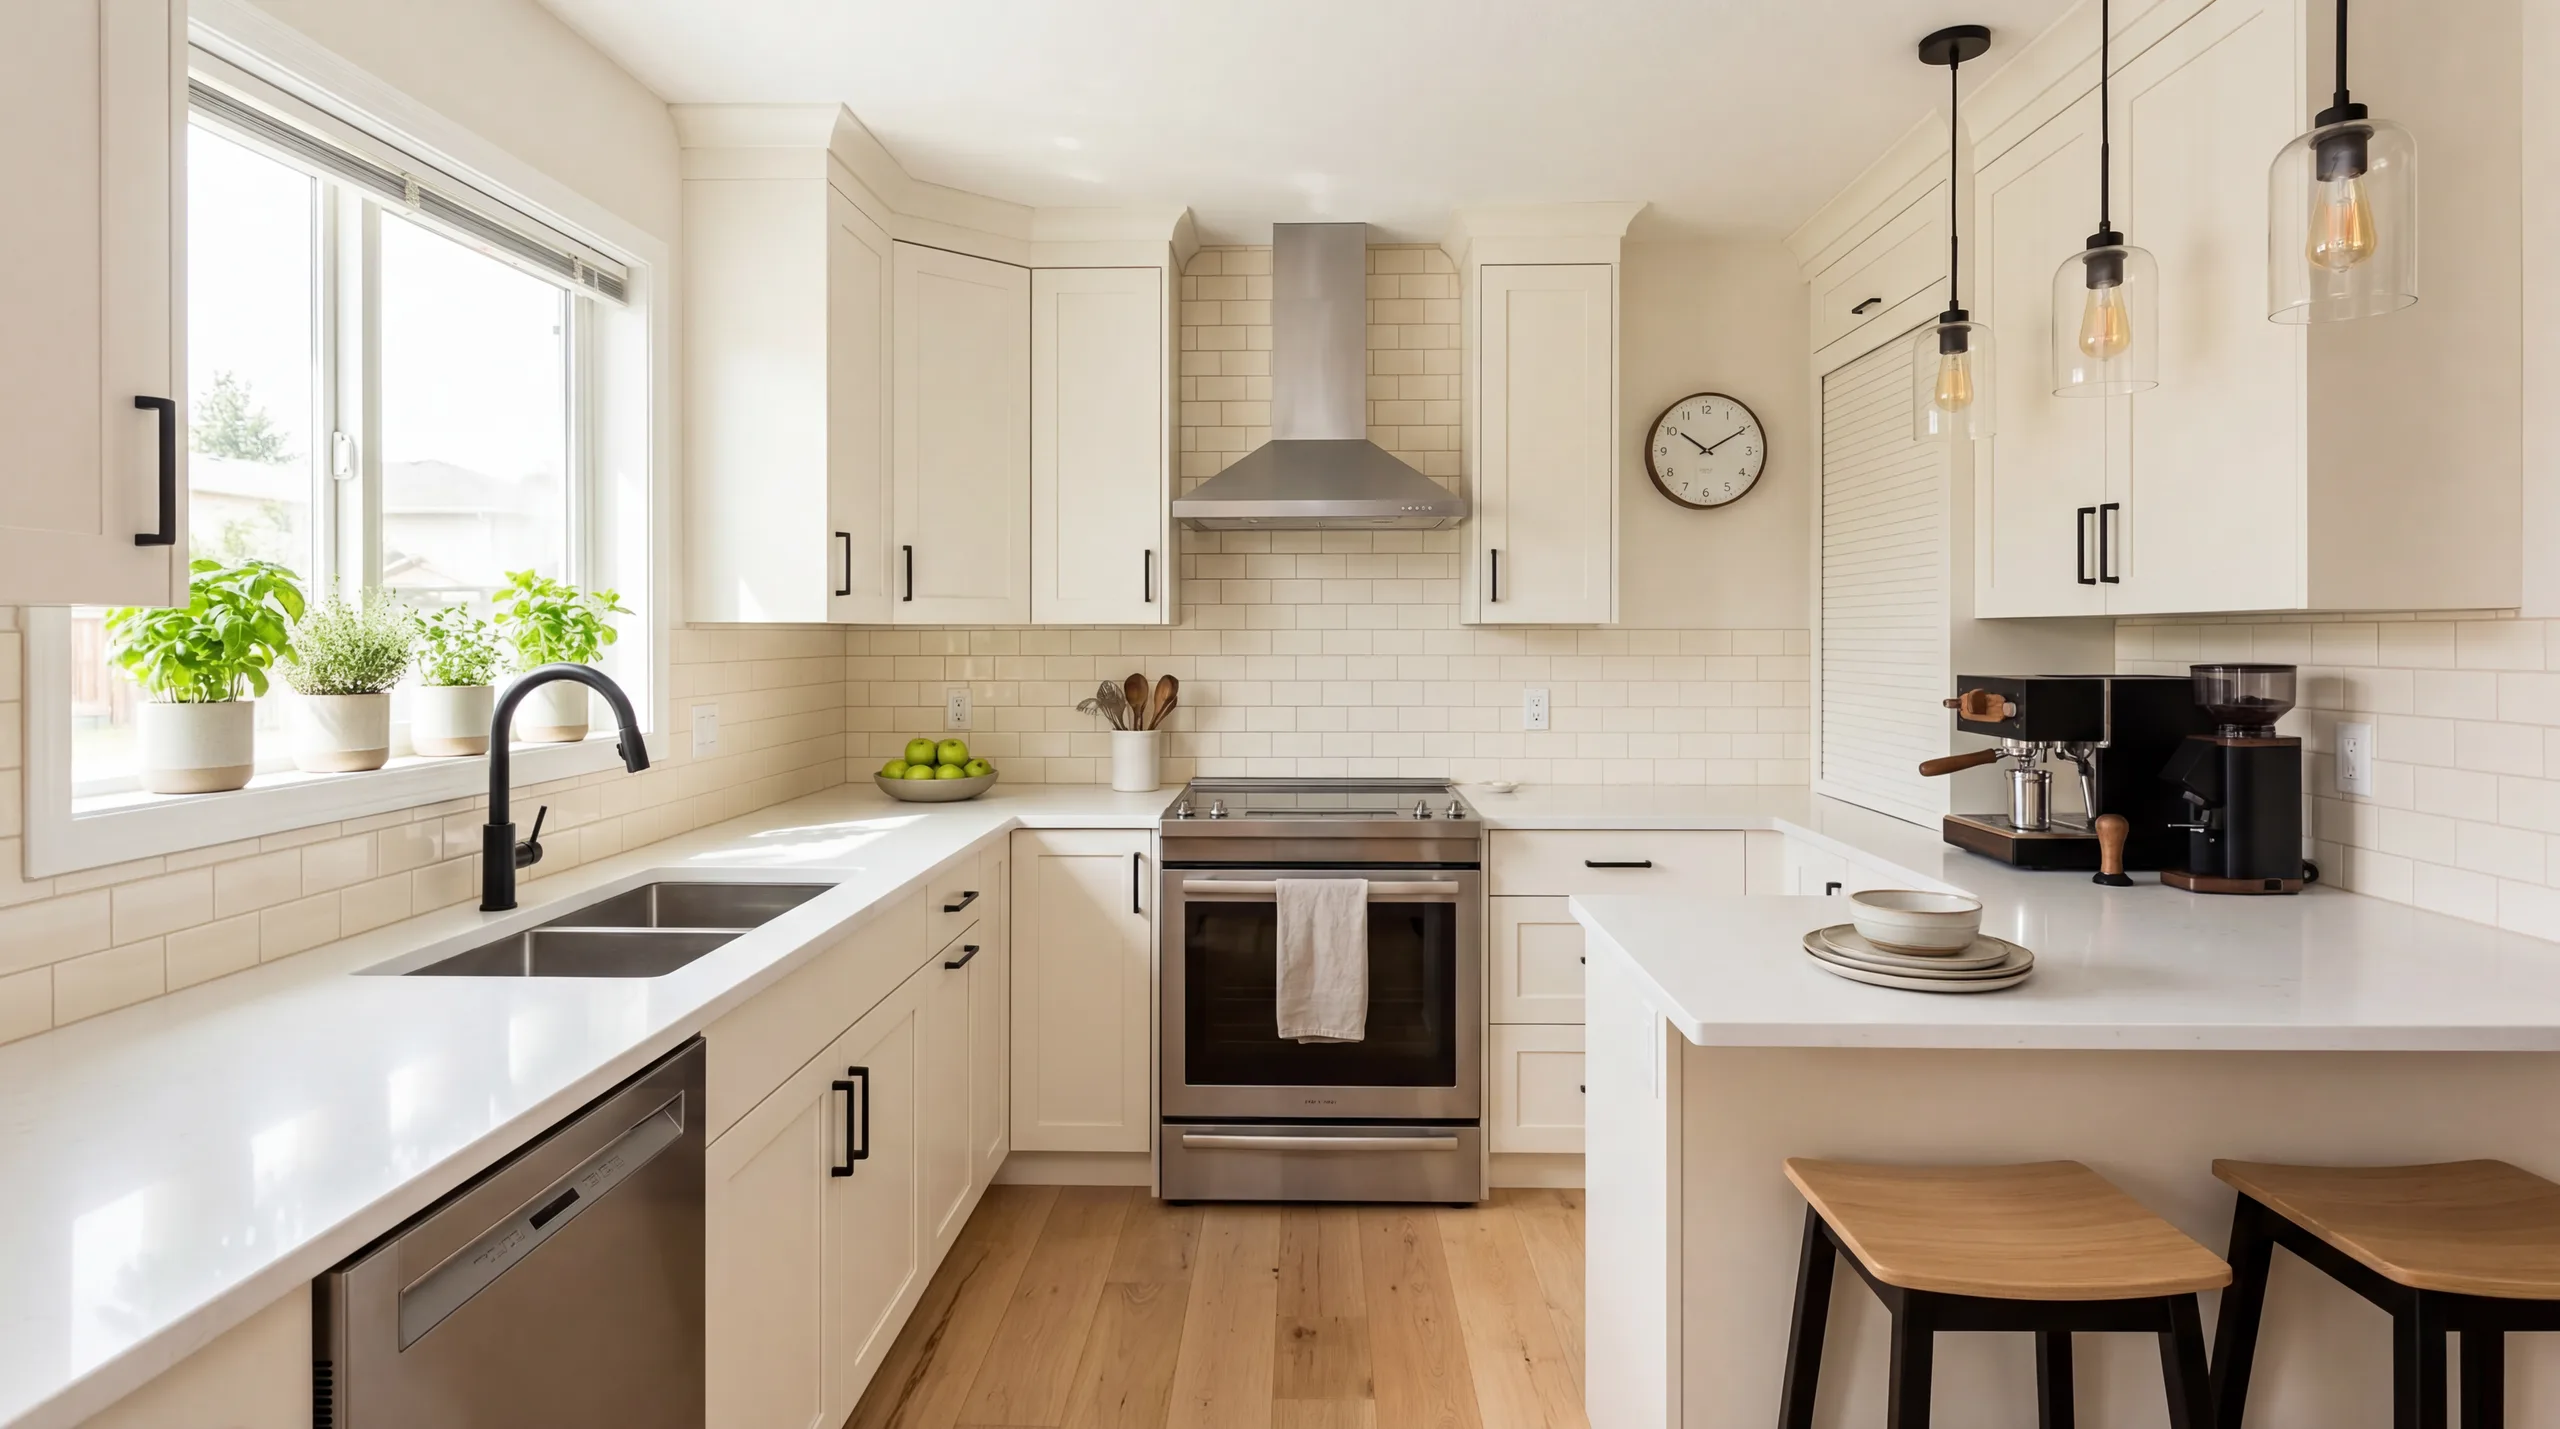 After
AfterTalk Track
"Kitchen staging should never imply changed cabinets, appliances, finishes, or fixed lighting. Use the staged image as a marketing proof, then review fixed details."
Family Room — Farmhouse

 Before
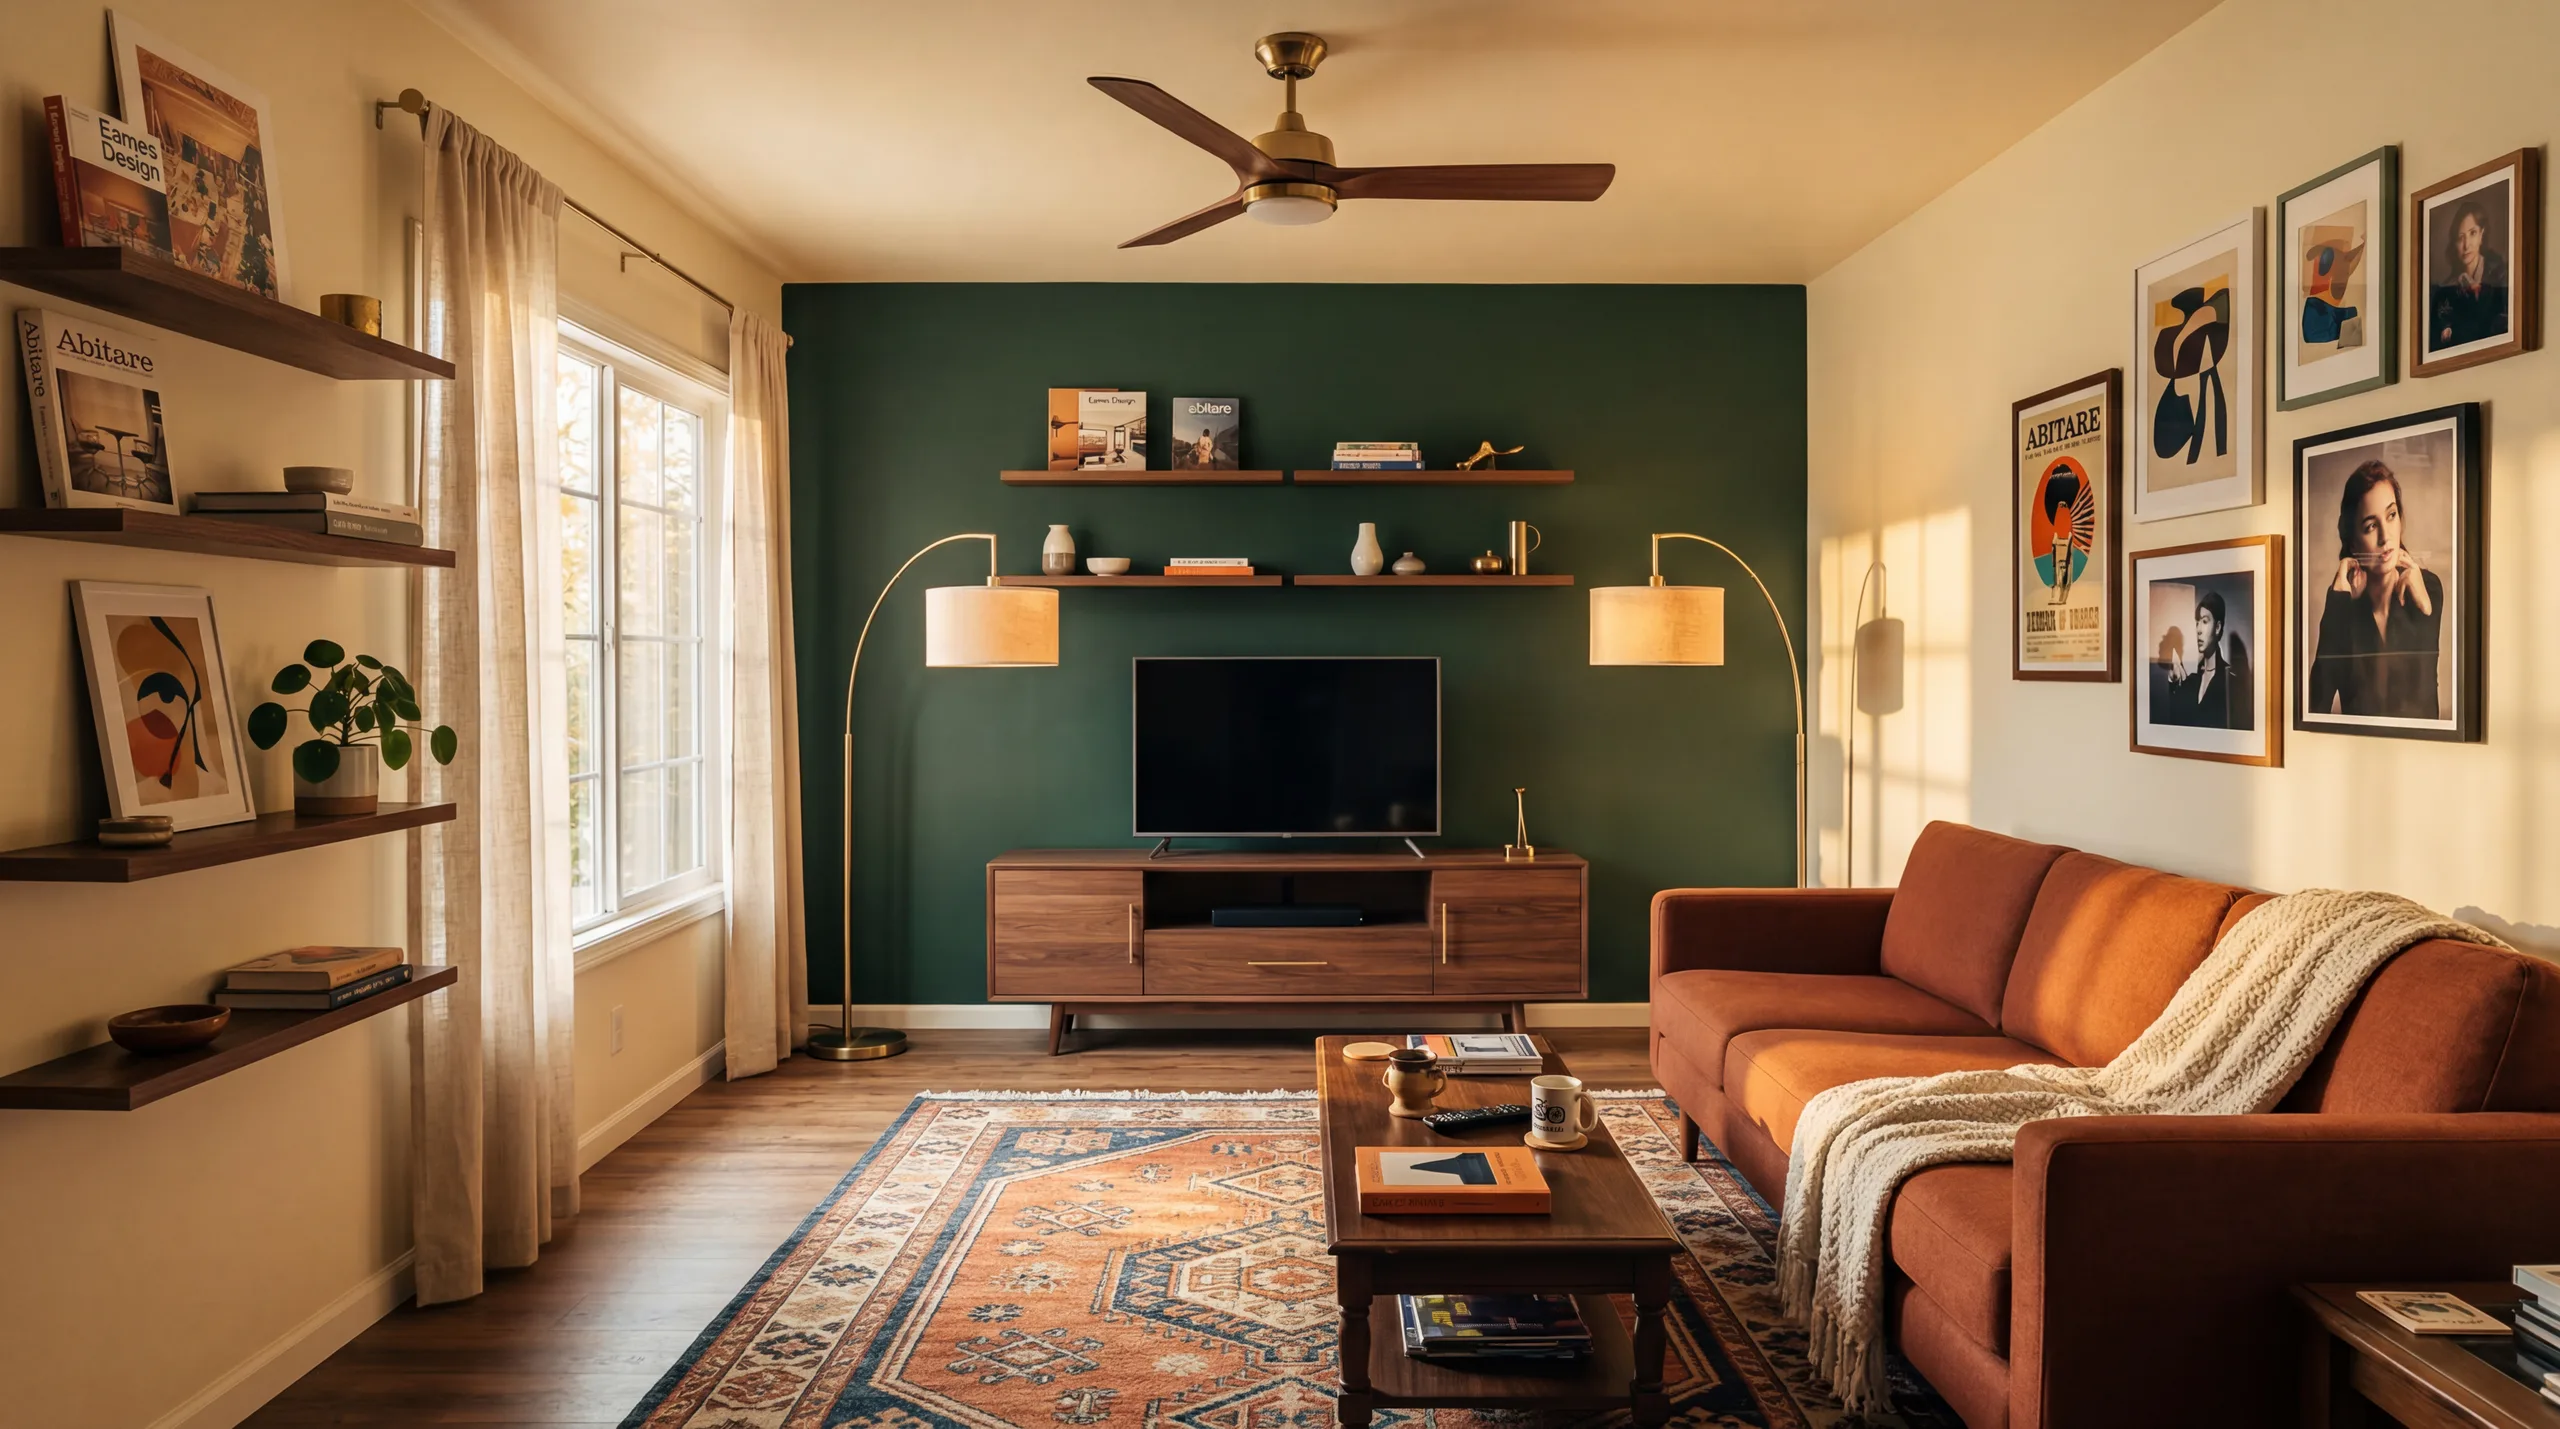 After
AfterTalk Track
"Family-room staging can clarify use and scale. Check whether furniture placement blocks doors, windows, or circulation before publication."
The before and after examples above are review material. Check wall placement, window frames, flooring direction, ceiling line, built-ins, and visible defects against the original before using a staged output publicly.
A useful proof should place furniture in a way that appears plausible for the photo angle. Still, every output needs review: check door clearance, window placement, floor direction, built-ins, and whether furniture scale changes how the room feels.
Lighting and shadows can vary by source photo. Treat the staged image as a candidate export, not a guarantee. If reflections, shadows, or furniture edges make the image feel misleading, regenerate or keep the original photo in the listing set.
Different room types showcase different aspects of AI staging quality. Living rooms demonstrate large-scale furniture placement with sofas, tables, and area rugs. Bedrooms showcase textile rendering including bedding, pillows, and curtains. Kitchens show detailed accessory styling on countertops. Bathrooms demonstrate coordinated small-item placement. Dining rooms show table setting and chandelier integration.
Each of our 12 design styles gives a different proof direction. Modern is restrained and easy to review. Scandinavian adds warmth with light wood. Farmhouse works best when the home already supports that character. Browse our style guide to choose a staging direction that fits the room without overstating it.
The examples show original room photos paired with AI-generated staged versions. Use them as proof examples, then apply the same original-to-staged review to your own images before publication.
Upload a clear empty room photo, select a style, create a proof, and compare the staged result against the original. For best results, use well-lit photos taken from a corner or doorway in landscape orientation.
Yes. Upload one photo and generate multiple style variations as proofs. Use the versions to compare direction, then export only the result that preserves scale, fixed features, and disclosure needs.
VirtualStagingAI offers three quality levels: Preview (1 credit, lower resolution with watermark), Standard (3 credits, 2K resolution, no watermark), and HD (5 credits, higher-resolution export). Choose quality after the staged proof passes original-to-staged review.
Upload an empty room photo, create a staging proof, and compare it with the original before export. Start with 5 free credits, no credit card required.
Start Virtual Staging FreeStage empty living rooms with Modern, Scandinavian, and Mid-Century styles.
Learn more →Transform bedrooms into cozy retreats with luxury bedding and decor.
Learn more →Stage kitchen accessories while preserving fixed finishes.
Learn more →Create listing proofs, review structure, and keep originals available before publishing.
Learn more →Browse 12 staging directions and choose the safest first proof for the room.
Learn more →AI virtual staging is a planning and listing-proof workflow. Keep the original photo, compare the staged result against the real room, and disclose generated furniture or decor according to your brokerage, MLS, portal, or rental-platform rules.
Strong inputs matter more than dramatic prompts. Use level, well-lit photos with visible floor, walls, doors, windows, fixed features, and enough room shape for the model to understand scale.
Empty or lightly furnished rooms where buyers need help understanding scale, layout, and possible furniture direction.
Bathrooms, mirrors, kitchens, luxury finishes, and rental listings need closer review because small inaccuracies can change buyer or guest expectations.
Dark, cluttered, distorted, damaged, or misleading photos where a generated result would make the property look materially different from reality.